
If you are tired of conventional manicures and want to experiment something that is a little more on the out of ordinary side, try out this awesome tutorial. You basically highlight, in a modern way, the natural part of your nails and accentuate it with the help of black lines that create a sort of a border between the nail that will have polish on and the part that will not have any. Doesn’t require a lot of time to make and this looks really interesting.
What you will need:
– scotch tape:
– white nail polish;
– black nail polish with a thin pencil for nail art;
– transparent top coat.
Directions:
1. The first thing you will do is to add some scotch tape to each and every nail you have. It should be placed somewhere in the middle.
2. Add the white polish to the area that remained clean of scotch tape then carefully take the tape town.
3. With the help of the thin pencil apply black nail polish to the border between the white polish and the plain nail, then outline the lower part with the same black.
4. Let everything you have done so far to dry then apply the top coat.
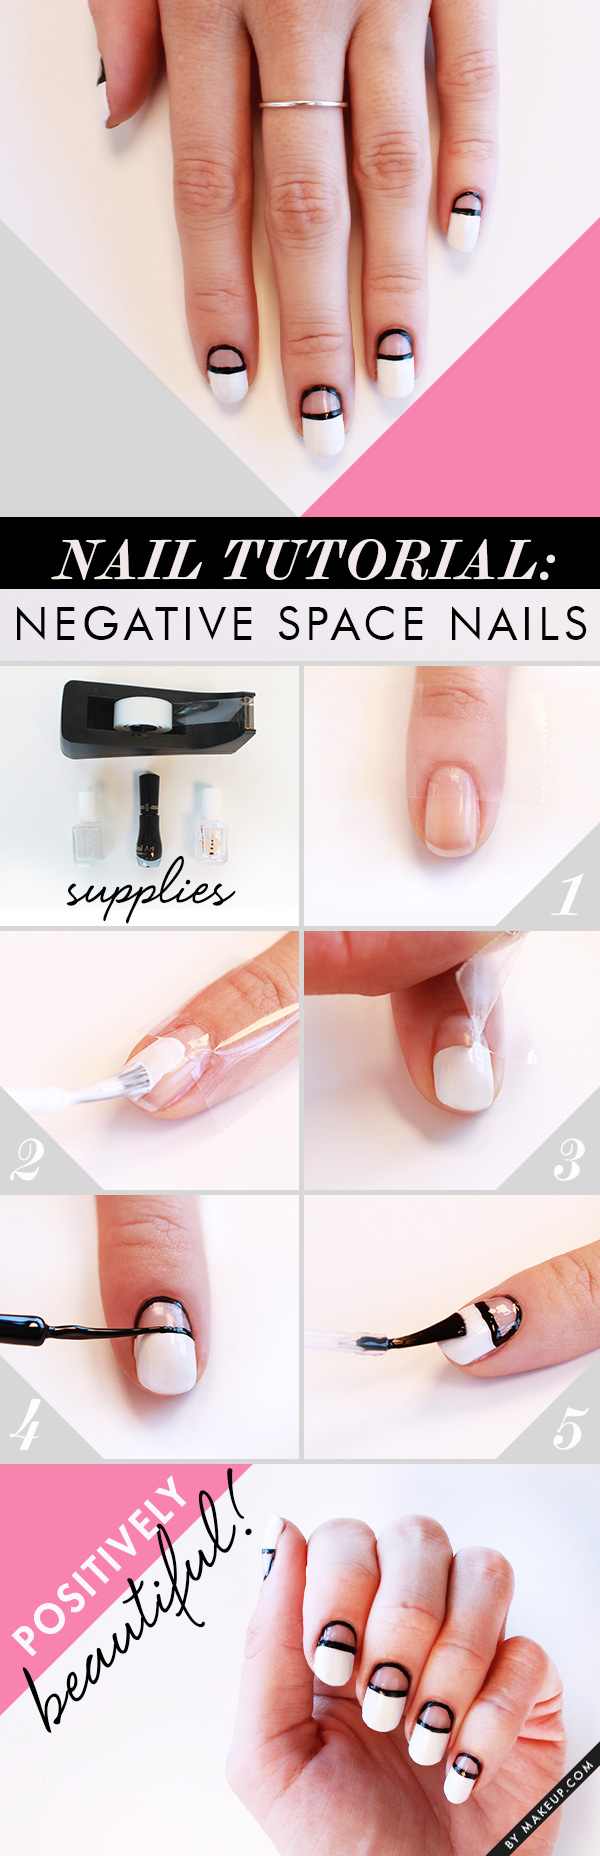
Photo courtesy: makeup.
Keep being AllDayChic!


