
To transform your old shirt into a fancy looking apron, it is necessary to use the front part of the shirt.
You will need:
– scissors;
– needle and thread;
– sewing machine (optional).
Directions:
1. Cut the front of the shirt and detach it from the back part.
2. Eliminate the sleeves cutting them on a diagonal, from the collar to the waist. There are two versions: to keep the collar on or to remove it and apply a strap – it is your choice!
3. Continue and cut out two identical straps from the back part and attach them on the two sides of the waist’s line. If necessary, you can sew the margins.
4. Now, your apron made from a shirt is prepared to be used wherever required – in the kitchen, in the garden or in your workshop!
Enjoy!
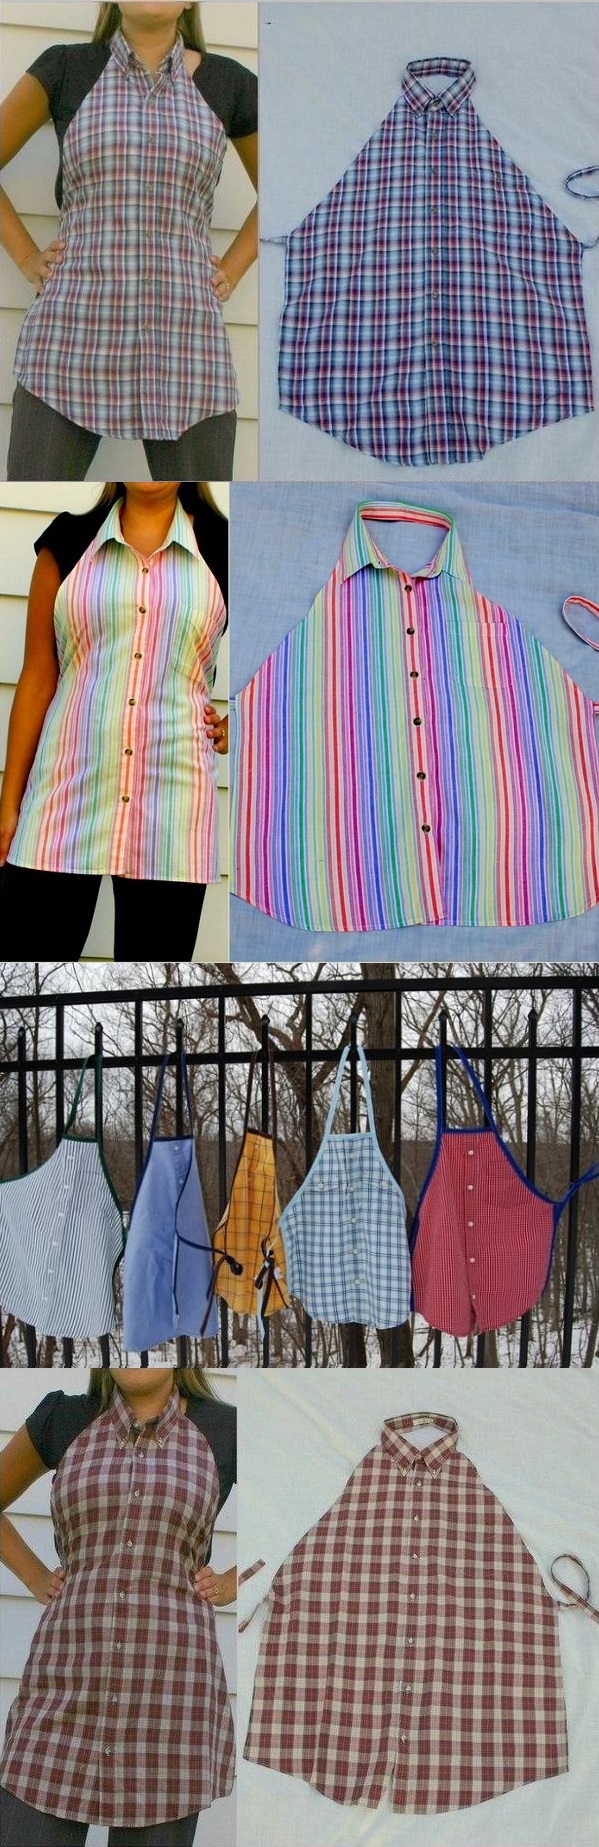 Photo courtesy: liveinternet.
Keep being AllDayChic!


I love this idea and will give it a try.
I just picked out a shirt to make one later today. I am intrigued by the idea. I will ad some trims and a pocket.
Can I pin this?
Of course! 🙂
What a great idea….. where’s that shirt!?
So super cute! Thanks for sharing!!
So interesting especially that I’m a beginner and now I love sewing
I love the idea! Sometimes if I don’t feel like sewing small projects I use the band of sticky tape used in sewing. I can’t remember the name of it. I’m sure if you go to the counter at your local fabric store or Walmart the sales representative can assist you in finding the product I’m talking about. It works well for small projects and holds well if the item it’s used on is not ‘abused’. I apologize for not remembering the name of the tacky strip of non-sew hemming and sewing product. However, I’m gonna use it when I make this apron to keep the edges from fraying. Great idea! Thank you for sharing!
Hi! I love the look of these and bought some shirts from the thrift store! ($4 and $5) They came out great except the bias cut (from collar to waist). I have hemmed one and bound one and they are both a little wavy! Did this happen for you? If so do you have a solution?
To solve the bias cut problem, you could try folding the shirt along where you want to make your cut, then sew across that edge 1/4″ from fold. Then cut off the one edge that you don’t want anymore (if you know what I mean). That way you have stabilized the bias prior to cutting. Plus you’ll have a finished edge. Or, if you have a serger, just serge along the cutting line – it will sew and cut at the same time. That might work too.